Monday, August 2, 2010

T-Shirt Headbands

If you've been following my blog for a while you may have figured out I'm passionate about a few things- finding stuff on the side of the road and redoing it, and my son Connor and making stuff for him. But what you may not know is that I'm also passionate about something else- running. I was trying to think of how I could combine my passions- making "stuff" and running.
Most gear for running is specialized, but I got to thinking about the hair bands that I wear. They are pretty plain, but get the job done. How could I jazz them up a bit?

This made me think about all the T-shirts we have in our closet. We have tons! I should give them to Goodwill but if you've been to a Goodwill lately they already have tons of T-shirts of their own. So I decided to recycle some of my old shirts to "fancy" up my running headbands.


I began by cutting strips out of the shirts.


Then folded the seams under and wrapped the strip around the headband. I left some of the band open at the bottom so it would still stretch enough to fit over my head.


I proceeded to sew it closed.


I sewed the ends closed so the fabric will not slide around.


I made some fancified ones as well:


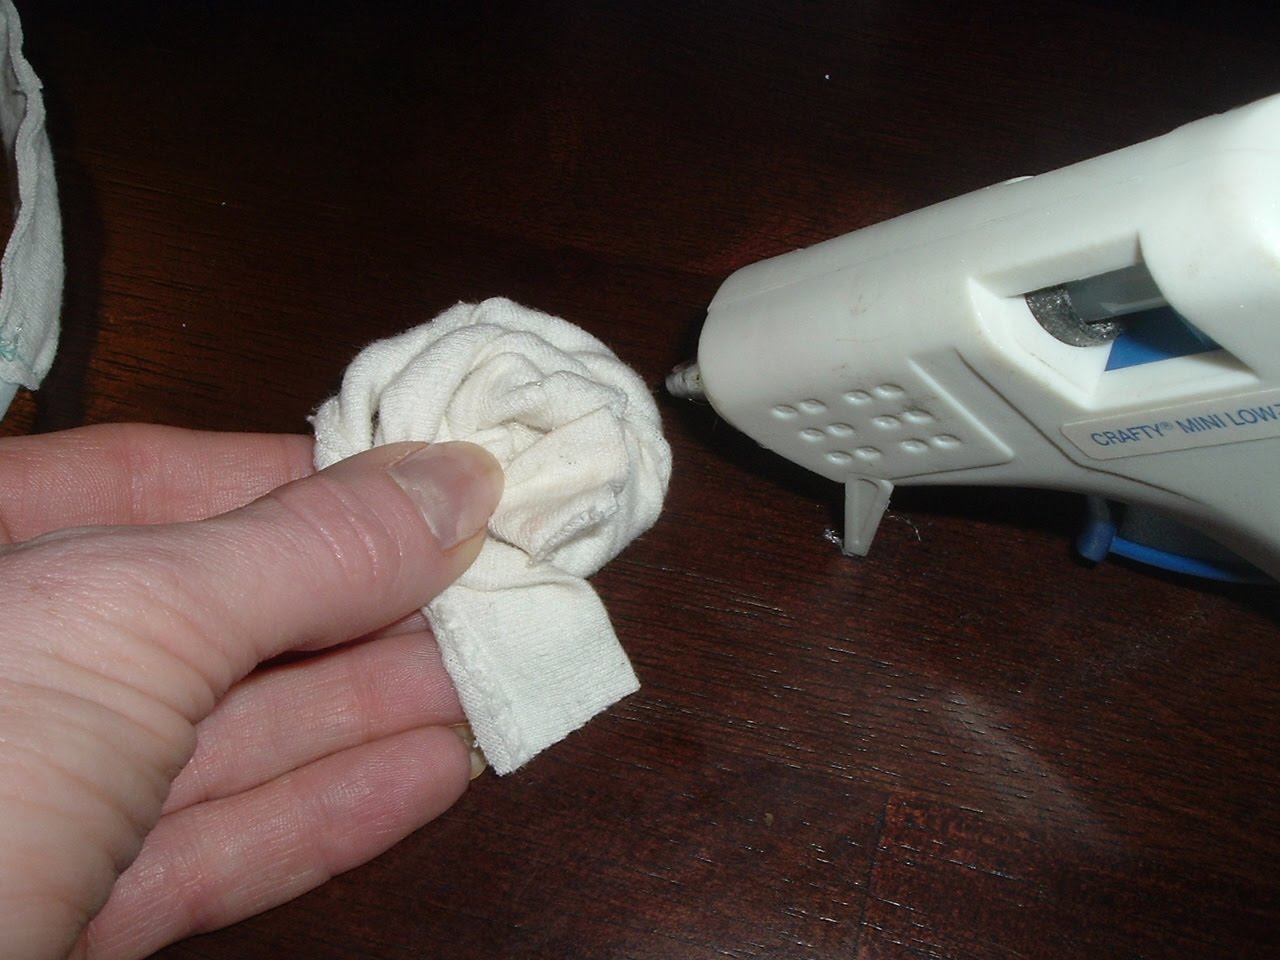
I created one of those cute fabric flowers I've been seeing around. It was easy to make. I just twisted the fabric around on itself.


Then hot glued it on.

For this one I didn't use a T-shirt but used some of the scraps leftover from the pillow I made last week. (Apologies for the pictures- the hubs is out for the month on duty, so unless Con-Man learns how to use a camera this is the best I can do!)


Now I have cute headbands for every occassion all for the cost of elastic headbands; only $3.


Linking up to
Visit thecsiproject.com

Pillow Form


First of all I would like to thank these awesome ladies for featuring me this week. I was so excited!
Crazy Domestic featured my picture hanging technique.
Crystal's Craft Spot featured my stenciled end tables.


Thank you so much!


In my Vintage Chair Rescue post I mentioned that I made the pillow for it. I thought I would go into a little more detail about it today. We've already seen a way to make pillows using batting, this way uses a pillow form.


First either use an old pillow you have but want to change up, or buy a new pillow form. I had one lying around so I just used it. I scored the fabric on clearance for only $3 a yard for outdoor sun resistant canvas! Woo hoo!

Next measure the width of your pillow and add an inch. Then cut he length and multiply by 2.5 and cut your fabric. 

Or if you do "fuzzy math" like me, lay your fabric over the top and bottom of the pillow; right sides together then pin it close to the edges.


Sew it all the way almost all the around leaving about 1/2" seam allowance. Leave an opening in the bottom to insert your pillow in.

Turn the fabric right side out and insert the pillow.


Next fold the raw edges in on each other, pin and sew closed.


And viola! You're done! This only took me about 30 minutes for a custom one of a kind pillow.


    Linking up to the Visit thecsiproject.com

Saturday, July 31, 2010

All the colors of the Rainbow?


I was looking through a paint fan deck the other day and got to thinking- Seriously, who names these colors? Are they really trying in envoke some sort of emotional connection between you and the paint color? Or are they just names pulled out of the air randomly strung together.
I got to thinking more about it and did a little research online. It turns out I'm not the only one who wonders about this. I found some posts on this topic on Yahoo! Answers, most of the responses were jokes along the lines of "the Paint Color Namers all get together for a party, drink, then throw out names to their boss. Whoever has the craziest wins."


Some Examples:

Scanda (Short for Scandelous?)


Comical Coral (or yes, this is a hilarious color)


Lime Rickey (not sure what to say...)


Nuthatch (What?)


Butterscotch


Dutch Cocoa
 
Banana Cream (Ok now I'm getting hungry!)


Orange seems to have the best though:


Determined Orange


Rhumba Orange (party!)


Outgoing Orange (As opposed to his brother Introvert Orange)


I did find one article that was somewhat helpful, though it doesn't give the true answer as to how paint colors get their names.
 
http://www.namedevelopment.com/blog/archives/2007/08/paint_color_nam.html
 
What's the craziest paint color you've come across? I'd love to hear it! Happy painting!

Wednesday, July 28, 2010

Vintage Chair Rescue

Don't you love it when a project works out, especially when you weren't sure it would? That is the case with my project this week. I was hoping it would turn out alright...

Well lucky for me it did!


It seems that in our neighborhood you are not officially part of the hood until you have a cute little chair on your porch. Everyone has one; metal ones, woods ones you name it. So imagine my delight when I saw this little guy sitting on the side of the road waiting for the garbage man.


You may remember me posting about it during welding month . It was bent out of shape and rusted out on the bottom. 


Well I gave bending back into shape myself another shot and I was actually successful this time! No help needed from the hubs! 


Success!!! Unfortunately though while I was bending, pulling, and shaping, the rusted leg broke.


I was only upset for a moment because I realized this could be an opportunity to use my welder! I hadn't used it since my  curtain rod project and was itching to pull it out again. 


I started by using the grinding bit on my Dremel to get any old paint and rust off the area I was going to weld.


Now this is a part of the project that I wasn't sure would work or not since the leg was rusted pretty badly. Still I thought it was worth a shot.


Getting all set up!


And what do you know; it worked! I was able to weld the two pieces back together again!!!!


I decided to keep it red since it would go well with the paint on our house.


Making some progress! I applied 2 coats, hopefully this will help it from rusting out again.

All done looking fabulous on the front porch!!


I even made a  pillow to go with it.

So once again:
Before; rusted out, bent out of shape, sitting in the garbage pile.


After; shiny and good as new vintage chic!


The Humble Brag Supporting Habitat for Humanity
Read more at http://diyshowoff.com/2013/08/15/before-and-after-diy-contest/#DlHqDqOhFOFmE5zd.99

Sunday, July 25, 2010

Upholstery Pillows

First off this week I wanted to thank Kim at seven thirty three blog for featuring me during Creativity Week. I was so excited and honored!


In my last post I mentioned that I wanted to recover some pillows that came with my couch; well we had company in town again this week so unfortunately I didn't get around to it. But one of my readers, MalPal, was telling me about some pillows that she had recovered with fabric from a chair she got from the thrift store. So I thought I would invite her to be my first guest poster!


Hello Rachelle, 

 I have a simple easy craft that anyone with a sewing machine can make.  My daughter found a chair cover at the Good Will a few years ago.  It was in her car trunk while she was at college for about a year, then ended up at the bottom of her closet.   She recently got married and moved out leaving her closet for me to clean out.  I picked it up and was going to re-donate it back to the Good Will but had second thoughts.   I wasn’t sure why she picked it up, why she liked it or even what she wanted to do with it.   As I looked at it I realized what a pretty fabric it was.  


The texture is really a nice weight and the flowers have a beautiful stitch.   So I decided to make pillows for her hand me down couch to try and spruce it up.   I was quite surprised that the fabric as ugly as it looked as a huge piece when cut down to pillow size was quite nice.


I lay the fabric out on the floor to see what size pillows I could make with it.  I found that I could make the pillows 16 ½ “ with the fabric on the front and back.   I cut the pillows then stay stitched all around so that they would not fray.   


Then I put right sides together and sewed a ½ “ seem all around (I was trying to make them as large as I could).   I left one side of the pillow with an opening about 4” wide.   Just enough of an opening for my hand to go in and out with the stuffing.   I used 100% Polyester Fiberfill I got from Wal Mart (you can also use shredded foam).  I pulled the fabric through the opening and ironed the seams flat.  


I stuffed the pillow using a little poly fill at a time.  It is easier to adjust it so that it doesn’t clump and become lumpy.   I really stuffed the pillow full so that when you start sitting or leaning on it the pillow will keep its shape.  I used pins to close the opening so I could sew it shut on the machine.   You can also stitch it closed by hand if you like.   Pillows are so easy to make and don’t take up much time.  I liked the pillows so much I am going to see if there is enough fabric left to make me some.   I will most likely have to back the pillow with a matching fabric since there is not much left.   This is another way to stretch your fabric.


Thanks Mal Pal    


Wow! Those turned out great! What a good idea to reuse old fabric. Anyone else score some GoodWill deals lately? I'd love to hear about great ideas from other readers as well!