Tuesday, August 30, 2011

Come On Pottery Barn

I like Pottery Barn as much as the next person. Their furniture is classic, well made, and beautiful. But sometimes I have to wonder about them. While perusing through the latest Pottery Barn Catalog the other day, I noticed several items that had me thinking- "Come On Pottery Barn, I could totally make that for a lot less than you are charging."


Some examples:


The Alden Headboard made from Reclaimed wood


I think this is gorgeous, I love the look of old reclaimed wood. But this has me wondering- couldn't I just reclaim some old shutters from the Habitat Restore or a thrift store and do this on my own for a fraction of the price?

Then I saw this Rustic Organizer which I really liked:


What I also saw was that Kit from DIY Diva already made one of these and gives step by step instructions on how to make your own!

I've seen plenty of talented bloggers make signs similar to this one for less that $200 I'm sure:


I love how people have taken this idea and personalized it for themselves.

And this clock:


You could buy a plain clock face and cut a circle out of a piece of wood and you're done!

Another possibility is the Griffin Chandelier:


The frame itself is pretty simple, you could probably find one similar to it for less and add some rustic ropes to it. Boo Ya!

There are plenty more but you get the idea. So what am I trying to say here? That Pottery Barn does have nice stuff and is good for inspiration. But you can get their look for less by thinking out of the box and a little elbow grease.

What do you think? Do you peruse furniture catalogs for project ideas for your home?


Dremel Trio Winner!!!

Ok, I know you have all been checking back here every single day to see who the winner is- so I won't keep you in suspense much longer. Thank you to everyone who entered the Dremel Trio Giveaway; I hope everyone also enjoyed the Dremel Twitter Chat last week, lots of great prizes were given away there as well.


Now without further adeiu the winner of the Dremel Trio is:


Dremel Trio Giveaway
3rd drawing held by Rachelle Falcon
Completed on Tuesday, 30 August 2011 at 02:51:24 UTC
48 entrants, 1 winner


Winners (1)
1st: 17


Sharon @ Elizabeth & Co. said... 17

I friended Dremel on FB!

Congratulations Sharon!! I can't wait to see what amazing projects your able to complete with it. Please forward me your contact info so I can send it to the Dremel Company.


If you missed the Twitter Chat last week with Dremel & Chip Wade he'll be on their Facebook Page today to answer any of you building/ project questions!

Friday, August 26, 2011

PVC Wine Bottle Holder

You know that saying- "Necessity is the Mother Of Invention"? Well that is totally the case here. Some might think that a wine bottle holder isn't a necessity but I beg to differ. I'm sort of a hoarder of wine- if I see it on clearance at the grocery store I'll grab a few bottles. It's a great way to try new wine and have some on hand for when company comes over.


In our old house we had a huge pantry and my wine hoarding wasn't an issue. In our new house we don't have a pantry, so my wine has been collecting underneath one of the cabinets. 


Hard to reach and difficult to find what I'm looking for.


So, enter this:


I saw this uber modern wine holder online at Umbra for $150 + shipping. Ouch. It's made of metal and pretty awesome, so I guess I understand the high price. Since buying is not an option I thought about how I could DIY this baby instead.

Hmmm, PVC pipe as a substitute? Yes!

And since I've been raving about my Dremel Tool lately this is a good tie in. I bought lengths at the hardware store. It was a little over $1 a foot. You can have them cut it down to the length you need so you won't have to buy a big giant long pipe. I used 4" and 1.5" pipe.

I used the plastic cutting bit of my Dremel to cut the pipe down further to 6" lengths, 6 of each size. You can use a mitre saw or hack saw to cut the pipe if you don't have a Dremel. Be sure to wear eye glasses and a mask- pipe dust gets everywhere!


Once I had all my pieces cut I used a sander so smooth out the edges. If you use a different kind of saw you might be able to skip this step, my edges were not completely even. Then clean all your pipes to get any dust or residue off.


After that I arranged my pipes in the pattern I wanted, looking at the original picture as a guide.


My main issue next was how to attach the pipes. There's plenty of ideas of how to attach them end to end, but side to side was a different story. I decided to use a mixture of screws and epoxy glue made for plastic. (*Note: I have recently learned that Pluming Adhesive would be best for this!) I used #8- 32 x 3/4" machine screws. We don't have a real hardware store in our town so this is the best Walmart had. They are long enough to fit through the 4" tubes where they connected and not to long on the ends where the 4" and 2" tubes connect. 

I marked the edges that needed screws then drilled 2 holes on either end 1" in from the ends. 


This was the hardest and most time consuming part. Marking each edge then drilling took some time but was successful in the end. After is was all together I used Locktite Epoxy Glue made for plastic (again all Walmart had- E6000 or another brand would work fine) and poured it into the crevices. Because the screws are attaching hard edge to hard edge, the joints were a little wobbly. The glue helped keep them in place. Next time I might try rubber washers and see how that does instead.


I let the glue cure for 24 hours, then it was time to paint! I used a white Rustoleum spray paint to cover any of the original markings on the PVC pipe and to disguise the screws.


Finito! Fini!


Now I can display our wine and not have to dig around for it in a cabinet. I'm like, a real wine connoisseur now.


For the pipe, screws, glue, and paint this whole project cost me around $20. Not bad for a modern wine rack!

How about you? Are most of you projects based on need?

Wednesday, August 24, 2011

Dremel Twitter Chat with Chip Wade and Giveaway

I'm so excited to be part of Dremel's group of To-Do List Bloggers. Not only do I love Dremel but I love me some HGTV! Well, Dremel has partnered with HGTV's Chip Wade from "Designed To Sell" and "Curb Appeal: The Block" to help Americans gear up to tackle their Top To Do Lists. 


Each month Dremel and Chip will release a new step by step video on Dremel's Facbook Page guiding consumers through what surveys revealed are their top projects for the year. Chip will show us how to take on these projects with ease using our Dremel Tool!


Watch as Chip Guides you through a project using Dremel Tools:


To celebrate the kick off of Dremel's partnership with Chip they are hosting a Twitter Chat tomorrow evening Thursday August 26th at 8PM CST and Chip himself will be there to answer any DIY questions you have!


Count me in!


If you want to join in on the conversation at search #DremelDIY and while chatting with Chip you'll have a chance to win one of the many PRIZES! 


AND


To further celebrate Dremel has offered to giveaway a Dremel Trio to one lucky reader! Yay I'm so excited!!! I love the Dremel Trio!


The Dremel Trio is a versatile 3 in 1 tool, it can be used for cutting, sanding and routing. It's light weight and easy to use- valued at $99! 


Score!!!!!


How To Enter:


1. Friend Dremel on Facebook at Facebook.com/Dremel

2. Follow Dremel on Twitter at #DremelDIY


3. Follow Adventures In Creating! Leave a comment if your already a follower.


4. Tweet or blog about this giveaway.


Leave a comment for each entry. Thats 4 ways to enter! This giveaway will start now and will be open until Sunday August 27th and noon. The winner will be chosen through Random.org and will be announced shortly after. Please leave your email address in your comment if it is not on your blog. I am in no way compensated for this giveaway- I just love Dremel Tools!


Good Luck!!


*This Giveaway Is Now Closed*

Monday, August 22, 2011

Giveaway Sneak Peek

Last week I mentioned that I had an awesome giveaway coming up on Wednesday of this week. I usually don't do giveaways so you know this one is good. I can't discuss all the details yet but here's a little teaser of what to expect.


You all know that my favorite tool is my Dremel 4000 Rotary Tool. The Hubs gave it to me as a present a few years ago and it's been my go to tool for many projects. 


It helped me complete my Vintage Chair


I also used it while making my Curtain Rods


I used it while making my Wine Bottle Glasses


I could probably go on but the point is that I only have to go to one tool to do the job of many. It does projects that other tools could not. The possibilities seem endless. I recently got another Dremel- The Demel Trio and have projects in mind for that as well.

So, would you like to have a Dremel Tool? If you could choose one which one would it be? The Trio, 4000, or Multi Max? Let me know ASAP! Hint Hint...

Friday, August 19, 2011

Got Space? Let's Plan It!

*STAY TUNED NEXT WEEK FOR A SUPER AWESOME WAY COOL GIVEAWAY!!*


Often when I'm reading through other blogs or websites I see a lot of comments from people about the best way to lay out their furniture in a space. This is a recent issue that I had when we moved into our new house and I thought I'd show you a way to go about doing this on your own without physically moving your furniture around 10 times.


In design school and in my past jobs whenever we had a job, Space Planning is one of the first priorities. Basically we need to figure out how the room is going to function, what are the existing architectural features, how people will flow through it, what furniture needs to be placed?


For example, the flow of traffic in our living room comes from two different directions; the front entry and the kitchen.


So I need to keep these areas free of furniture for the paths of travel. An ideal walkway in a room is 3'. In residential spaces that is not always an option so as little as 20" can work. Any smaller and you'll be constantly bumping into the corners of your furniture.

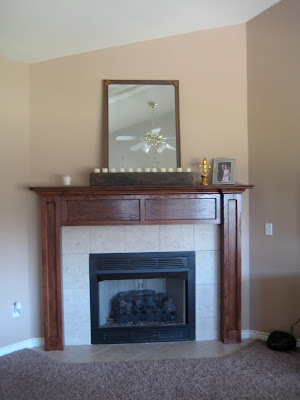
Once you have an idea of flow in your room think about the features your room has to offer. You'll want to highlight these. Our room has two major features- the fireplace and wall of windows.


Ideally I want my furniture to face the fireplace and let the windows stand out by not blocking them with a large or tall piece of furniture. I also needed to consider the placement of the TV. This is our main TV watching room so that would be a feature as well.

With these ideas in mind my first idea was to lay out the room like this:


I thought having the couch against the back wall would help anchor the space, and the two chairs would give a feeling of openness when viewing from the kitchen. But after looking at if for a while it seemed like the couch wall felt too "heavy" and the coffee table placement was odd.

So try number 2 gave me this:


I still have all my paths of travel, my furniture is facing both of my features (fireplace and TV) and the windows are readily visible (though I still need to hang curtains....)

This is the view in real life:


With the furniture pulled off the wall and placed in an "L" it creates a sense of closeness and encourages conversation. Everyone can see the TV and fireplace.

While I was doing this I played around to see what other configurations I could come up with, there's really no right or wrong answer.

I wondered what the room would be like with the TV on the opposite wall.


Again I have an "L" shape layout for the furniture, the sofa is on a large blank wall that could give me an opportunity to hang a large piece of artwork. But it seemed like the TV would be to far away and it also creates a path of travel right in front of the TV- not so good. And the fireplace seems to get a little lost.

If we had been able to hang our TV over the fireplace we would have had a layout similar to this:


This lays out nicely as well. It almost creates a "U" shape with the furniture which is also good for conversation. Both the fireplace and TV are highlighted and the windows are open for all to see.

If your thinking of rearranging the furniture in your home keep these ideas in mind. Try using graph paper to lay out your room like I did in our last house when I was deciding on TV placement, a quick sketch can do the trick.


Each square represents 1'. Do a quick measure of your room and draw it out, then measure your furniture and play around; it doesn't have to be perfect. Keep in mind your paths of travel and features of the room, try to leave at least 20" of walk space between furniture. Try different configurations, see what looks right and what doesn't, have fun with it! 

You never know what you'll come up with!

Tuesday, August 16, 2011

DIY: Fail

I like to keep things real over here on my blog, that's one of the reasons I named it "Adventures" in Creating. That's why I thought I'd share this "fail" with you. ;)


As I've said a few times before, a lot of what I do is based on an idea and scheme I get in my head. I think about and research the best ways to go about implementing said idea and scheme. Most of the time my research pays off and my projects turn out successful. 


Other times, well they just, don't. 


This was one of those times. Like a lot of the country Oklahoma is going through a major heat wave. The Con-Man and I are stuck inside most of the day which can get old especially for a rambuncious 2 year old. Our rental is in a new neighborhood built on old farm land- this means no trees. No trees = no shade = barren desert backyard.


So I wanted to figure out a way to get some shade in the yard, preferably off the patio. I've always loved what Morgan of the Brick House did for her yard. She used a Sun Shade to create a cool spot to hang out in and eventually will put a pool under it.


I was pumped when I saw Overstock had their Sun Shades on clearance! I bought on 11'x11' for only $30. Score! 


My main problem is that usually you need these things secured to the side of your house or have posts secured in a hole with poured concrete. As a new renter I didn't think my landlord would be please with large holes dug in his yard of drilled into the side of his house. 

So I brainstormed a way to do a temporary set up that I could easily take down as I needed. I was all excited to write an awesome post about how I bought and cut posts for it, poured concrete, hung up my shade and let Con-Man play his heart away in his new shady yard.


Everything seemed to be on task until I tried to hang up my sun shade. My posts kept toppling over with the slightest breeze. After a few unsuccessful attempts I thought if I weighted them down with bricks that might help.

But no....


Ugh Curses! Obviously I need to rework this plan, I haven't completely given up on it yet. I will have shade in my yard and it has to be soon. It's not getting any cooler around here anytime in the near future!

Friday, August 12, 2011

A French Toast Post!

Recently I've had a lot of time on my hands- I'm getting into the groove of the Stay At Home Mom thing. Being at home has given me more time to a lot of the things I didn't have time for when I was working, like cooking. I've had a lot of time do whip up some stuff in the kitchen lately.


 I've always enjoyed it, as my Dad says: "I don't like to cook I like to eat!" Same goes for me. Back in San Antonio I really only had time to make nice meals on the weekends, now I can do it whenever I want and I'm loving it!


I cooked French Toast this weekend for Con-Man. It's the first time I made it for him (I haven't made it in forever!) It's delicious and easy to make! 


All you need is:


6-8 eggs 
1/3 Cup of Milk
1 Tblsp Sugar
White Bread (bread that's about to go stale or the cheapest loaf you can find works best, it soaks up the egg mixture really well.)


Scramble your eggs then mix all your ingredients together in a bowl.


Carefully soak each side the bread in the mixture. Make sure it is soaked through but don't leave it in to long or it will get to really soggy. 


Then gently lift the bread out of the egg mixture and place into a non-stick pan and cook both sides on medium/ low heat till done.


Continue the process until you run out of the egg mixture, or until your breakfast brood stops asking for more. I meant to get a picture of Con-Man enjoying his but I was to busy pigging out on mine. 


Top with powdered sugar, syrup, and fruit and enjoy!