Monday, August 9, 2010

Guest Blogger: Crystal from Crystal's Craft Spot!

I am so excited to welcome Crystal from Crystal's Craft Spot as my first guest blogger today! I love her blog, she has so many cute projects and ideas I check it daily for inspiration. She also hosts a weekly link party- Crystal's Craft Spot Challenge. But enough from me,  here's Crystal.

Hi Everyone! I am so excited to blog swap with Rachelle today. I just love her cute blog and great craft ideas.
I am Crystal from Crystal's Craft Spot. Its my little spot to share my current craft projects, tutorials, recipes, and ideas I want to use in the future. I have also started a craft challenge every Wednesday and Feature yourself Friday that I would love for you to join. I try to post something new almost everyday and I enjoy a variety of crafts. It is my way to relax and take a break from a busy day. Here's a little more about me: I've been married for 5 1/2 years to the greatest guy ever.
I am a stay at home mom of two adorable little girls (4 and almost 2). They keep me very busy. When they are awake we spend our time playing, learning, making messes, and occasionally cleaning.
I teach my daughter preschool at home and we post our fun activities and crafts on our preschool blog.
I love to read, watch Lost (so sad its over), and movies
I love Blogs! I love looking at others for crafty inspiration, I love staying in touch with old friends and making new friends
Here are some of my favorite projects you will find on my blog:


My bedroom furniture


Come by Crystal's Craft Spot anytime for more crafts and tutorials. Thanks again for letting me stop by. Its been a lot of fun!

Sunday, August 8, 2010

Weekly Wrap Up

What a week it has been! First of all I would like to thank

 Rachel at One Pretty Thing for featuring my T-Shirt Headands. She is so sweet and I love checking her blog for project ideas.

Julie at Frugal and Fabulous Design for featuring my End Tables. She is awesome!

Secondly I cannot believe it but we've made 100 Google Followers!! Wow! This means GIVEAWAY- keep yours eye peeled for a giveaway coming up next week!!!

If you missed it take a look at our Blast from the past kitchen reno! It was a chore but totally worth it.  

More exciting things coming up next week- coming up are a few guest blogger and guest projects I know you will love.

Till Next Time!

Friday, August 6, 2010

Blast From The Past: Kitchen Redo

I started this blog only a few months ago, but there I've done other DIY projects in the past. One of the biggest was our kitchen. We live in a cute little 1930's cottage in San Antonio. We love the house's vintage charm but the kitchen was hard to deal with. It looked ok but wasn't very functional.


This was the only counter in the whole kitchen. It was only 1'-4" deep, your counters are probably 2'. We only had 4' of actually counter space, and very little storage. I did make that colander light above the sink, I was sorry to see it go but it had to in the name of function! That door you see in the background lead to our bedroom. Good for the occasional midnight snack but not good when you smell garlic all night long in your bed. And there was no dishwasher by the way...

This is the other side of the kitchen. There was no counter space for me to put pots or ingredients when I cooked on the stove. So I would have to walk back and forth to the counter constantly. And the microwave was mounted really high up. Seriously? How did people in the 1930's do it? They cooked all the time and didn't go out to eat like we do. I love to cook but it was tough in this kitchen. So after about a year of this we decided to take the plunge and renovate.


The first thing we was close up the door to the bedroom and center the stove on that wall instead. The plan was to create a U-Shaped configuration of cabinets to make the kitchen more functional.


We created a "cubby" hole for the fridge to slide into, this way it wouldn't take up as much space in the actual kitchen.


We tore out the cabinets and this is what was behind them! Wow! Yes our walls are made of wood. It makes hanging stuff easy because you never need to find a stud but difficult as well because the wood is so hard! (Petrified from years of San Antonio heat I guess.) We had an electrician come and rewire everything. It was also interested washing all our dishes in the bathroom sink.


Cabinets going in! We found these at the ReStore (after many weeks of searching).

Things are coming together! During this time we ate a lot of food that I had cooked beforehand and frozen, this way I wouldn't have to worry about cooking and we didn't need to eat out all the time.


Counter tops and sink! And a dishwasher! I didn't realize how much I would miss having a dishwasher until I didn't have one for a year.


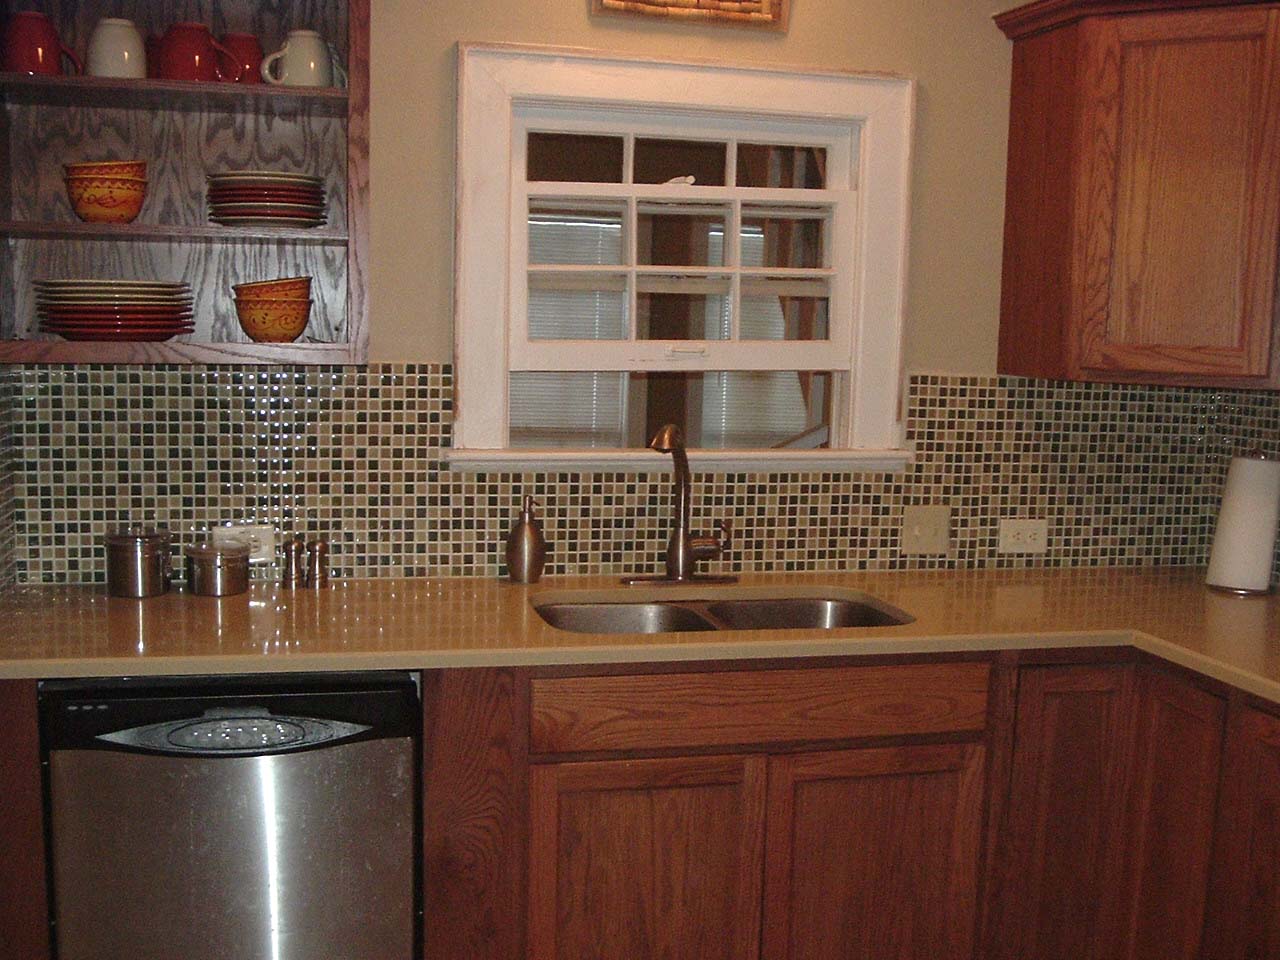
We got an awesome deal on the glass tile for the backsplash, it wa leftovers returned from another job. Since our kitchen is small we didn't need that much. We installed it ourselves to save even more money. I was pregnant at the time so I think this would have been an easier task if I didn't have a big belly in the way while leaning over the counter. Oh ya P.S.- this might be common knowledge for most people but I didn't know. Wipe off your grout in sections, don't wait until you have half the wall done. It will be almost dry and almost impossible to get off! My pain your gain!


Check out our faucet! It's one of those single handle ones!


We kept the original floor, it was in decent shape and by keeping it we saved a lot of money.


We installed the microwave ourselves as well. It was a chore, of course we had no idea what we were doing so maybe that's why.


The fact that our kitchen is small also helped keep costs down!


So- we went from a practically unuseable kitchen to one that is totally functional and fabulous! I hope you enjoyed reliving our kitchen reno with me. Has anyone else ventured into large scale home renovations? And good stories to tell?

Linking up to Visit thecsiproject.com

Monday, August 2, 2010

T-Shirt Headbands

If you've been following my blog for a while you may have figured out I'm passionate about a few things- finding stuff on the side of the road and redoing it, and my son Connor and making stuff for him. But what you may not know is that I'm also passionate about something else- running. I was trying to think of how I could combine my passions- making "stuff" and running.
Most gear for running is specialized, but I got to thinking about the hair bands that I wear. They are pretty plain, but get the job done. How could I jazz them up a bit?

This made me think about all the T-shirts we have in our closet. We have tons! I should give them to Goodwill but if you've been to a Goodwill lately they already have tons of T-shirts of their own. So I decided to recycle some of my old shirts to "fancy" up my running headbands.


I began by cutting strips out of the shirts.


Then folded the seams under and wrapped the strip around the headband. I left some of the band open at the bottom so it would still stretch enough to fit over my head.


I proceeded to sew it closed.


I sewed the ends closed so the fabric will not slide around.


I made some fancified ones as well:


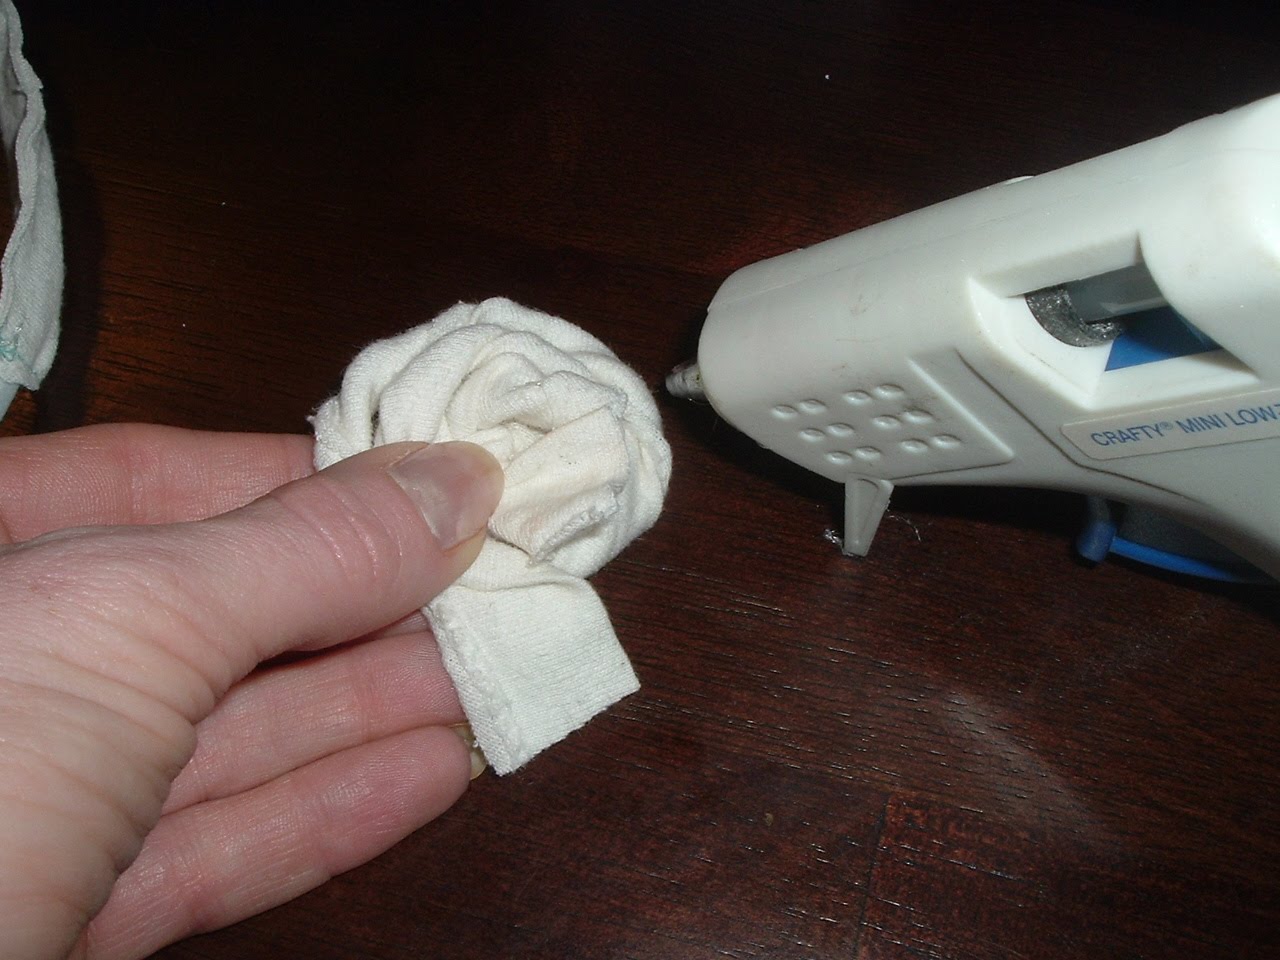
I created one of those cute fabric flowers I've been seeing around. It was easy to make. I just twisted the fabric around on itself.


Then hot glued it on.


For this one I didn't use a T-shirt but used some of the scraps leftover from the pillow I made last week. (Apologies for the pictures- the hubs is out for the month on duty, so unless Con-Man learns how to use a camera this is the best I can do!)


Now I have cute headbands for every occassion all for the cost of elastic headbands; only $3.


Linking up to
Visit thecsiproject.com

Pillow Form


First of all I would like to thank these awesome ladies for featuring me this week. I was so excited!
Crazy Domestic featured my picture hanging technique.
Crystal's Craft Spot featured my stenciled end tables.


Thank you so much!


In my Vintage Chair Rescue post I mentioned that I made the pillow for it. I thought I would go into a little more detail about it today. We've already seen a way to make pillows using batting, this way uses a pillow form.


First either use an old pillow you have but want to change up, or buy a new pillow form. I had one lying around so I just used it. I scored the fabric on clearance for only $3 a yard for outdoor sun resistant canvas! Woo hoo!

Next measure the width of your pillow and add an inch. Then cut he length and multiply by 2.5 and cut your fabric. 

Or if you do "fuzzy math" like me, lay your fabric over the top and bottom of the pillow; right sides together then pin it close to the edges.


Sew it all the way almost all the around leaving about 1/2" seam allowance. Leave an opening in the bottom to insert your pillow in.

Turn the fabric right side out and insert the pillow.


Next fold the raw edges in on each other, pin and sew closed.


And viola! You're done! This only took me about 30 minutes for a custom one of a kind pillow.


    Linking up to the Visit thecsiproject.com

Saturday, July 31, 2010

All the colors of the Rainbow?


I was looking through a paint fan deck the other day and got to thinking- Seriously, who names these colors? Are they really trying in envoke some sort of emotional connection between you and the paint color? Or are they just names pulled out of the air randomly strung together.
I got to thinking more about it and did a little research online. It turns out I'm not the only one who wonders about this. I found some posts on this topic on Yahoo! Answers, most of the responses were jokes along the lines of "the Paint Color Namers all get together for a party, drink, then throw out names to their boss. Whoever has the craziest wins."


Some Examples:

Scanda (Short for Scandelous?)


Comical Coral (or yes, this is a hilarious color)


Lime Rickey (not sure what to say...)


Nuthatch (What?)


Butterscotch


Dutch Cocoa
 
Banana Cream (Ok now I'm getting hungry!)


Orange seems to have the best though:


Determined Orange


Rhumba Orange (party!)


Outgoing Orange (As opposed to his brother Introvert Orange)


I did find one article that was somewhat helpful, though it doesn't give the true answer as to how paint colors get their names.
 
http://www.namedevelopment.com/blog/archives/2007/08/paint_color_nam.html
 
What's the craziest paint color you've come across? I'd love to hear it! Happy painting!