Monday, June 27, 2011

Coffee Table Part 5: Table Tops!

Thanks for all the nice comments on my new tables! They certainly were a labor of love. But now that I know more about building them I'm more confident to take on other furniture related projects. In the meantime though; as promised, here is the final step of how I went from this:


to this:


I last left off with just the frames painted:


After the frames were all welded and painted the last step was making the wooden tops. My original inspiration tables are made of old railroad ties, so I wanted the tops to have a stained and aged wood look. 

I debated on buying old wood planks or buying new and making them look old. In the end it was easier and less expensive to buy the wood new, so I went over to my local Home Depot and took a look around. I decided to splurge and buy the nicer grade pine since I was staining it. Helpful Hint- always pull out the boards your going to buy and look them over. Make sure they are not warped or are damaged. And keep in mind that wood is labeled in "nominal" inches (ex-  an 1" x 8" wide board) but is cut in actual inches (a board labeled 1" x 8" is actually 3/4" x 7 1/4").


I had the guys at Home Depot cut my boards down to size. sometimes they charge for this and sometimes they don't, I think it depends on if they feel like writing it up or not...

I wanted the tops to be extra sturdy so I needed to join the board together end to end. Unfortunately I don't have a Kreg Jig (like the fabulous Anna White) or a biscuit joiner, so I settled for the next best thing, Liquid Nails that I had left over from my bathroom remodel!

I ran a bead down the the ends of the center board, then laid them on top of the table and made sure they were all in line and even. Then clamped them tightly together and weighed the whole thing down with heavy books; this way the boards wouldn't bow up.


I left it like that over night. In the morning, even though I had wiped off the excess Liquid Nails some of it still seeped through. So I tried scraping and sanding it off- it was a pain! Lesson learned: keep an eye on your project at all times!


After I was through with that I went onto the next step of making my extra sturdy wood tops. I used something called a mending plate on the underneath of the table top to further help join the wood together. I marked where I needed to put the screws then predrilled the holes so as to not split the wood. Then screwed them all on. 

I used 8 evenly spaced for the large table top and 4 for the small one.


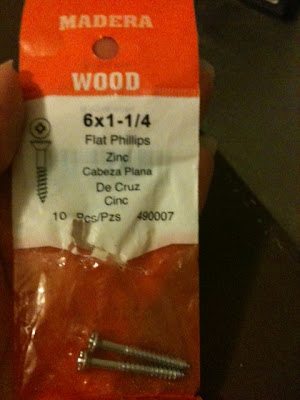
I choose to adhere the tops to the frames before I stained them, I'm sure you could go either way this just seemed easier to me. I used the metal drill bit on my drill and drilled several holes on each of the table frames. Then using 6x 1 1/4" wood screws I attached the tops to the frames.


I gave the tops a final fine grit sanding and then cleaned them off really well with a cheese cloth. Then it was time for the staining! I haven't stained a lot of wood before, I usually just paint it. So I wanted to make sure I knew what I was doing. I choose to use a Purdy Paint brush specially made for stain and choose a Minwax Stain in Dark Walnut.

I made sure to paint in the direction of the wood grain and did a small section at a time, wiping off any excess as I went along with a paper towel. I let the first coat dry completely overnight before applying a second coat.


Once all my stain coats were done and dry I sealed it with a rub in sealer also from Minwax. I bought the satin sheen because I didn't want it to be all shiny and new looking, I liked the natural look of the wood. I did 3 coats of this since I have a feeling the tops are going to receive a lot of abuse. I used the rub on kind because I didn't want to risk leaving brush marks on the wood. It goes on easily, I just wiped it on with a soft rag.


I also tried to add some vintage wood style details:


And then all done!! Overall the cost was about $100 for the steel, stain grade wood, and supplies. Not bad considering I had originally seen them selling at Anthroplogie and Viva Terra for $399-$599 respectively. Boo Ya!


I just want to say that if you really want something, and you put your mind to it you really can accomplish what you want. These tables are truly a testament to that! If there's something your not sure of how to do do research! Look online, ask the guys at Home Depot, ask a friend or neighbor if they have any insight. That's a big part of how these tables came to be!


Sunday, June 26, 2011

Anthropologie Inspired Coffee Table

It might have taken awhile, I might have run into a few road bumps along the way, and some poople may think I am slightly crazy for taking this on but my coffee table is finally finished!


It all started while browsing Anthropologie and Viva Terra online (this was so long ago they are not even on the website anymore! All I could find was the console table that went with the set) and lusting after the fabulous furniture they have. I love the look and style but the price is always out of my reach. About 6 months ago I saw this coffee table:


I decided to turn my lust and longing into something tangible. We needed a new coffee table, I was tired of the old Ikea one I had since college and wanted something more grown up. So I started on a quest to build my own replica of the table above. After much planning, research and building I finally have it all finished!


I am incredibly happy with the final result and really happy to be finished! I don't have a lot of experience staining wood but I think it turned out pretty well. I tried to add some aged touched to the wood to try and replicate the look of old railroad ties (Which the coffee table I was inspired by is made of).


Here's a full post on how I made the table tops and check out the other parts of the process here to find out how I went from this:


To This:


Thanks and have a great rest of the weekend!


Thursday, June 23, 2011

Happy Anniversary!

I apologize for yet another non-design related post but I just had to say- HAPPY ANNIVERSARY!!! to my wonderful husband of 5 years. 5 YEARS! 

I couldn't have asked for a better partner in life to share all the ups and downs and in betweens with. We've been through a lot together and still have many years ahead together.

We met on a blind date! A mutual friend knew I needed a date to a sorority dance and thought Corey would be perfect for me. We were both freshman in college with hectic schedules and couldn't figure out a good time to have a date. So I mentioned I was going to evening Mass on Sunday and he said he'd come along.

So we had our first date at Church of all places!


We remained good friends for a few years. Then eventually friendship blossomed into love! Aw!!


We've done a lot of living already- along with our first 2 babies, Gracie and C.C. our dog and cat we have Con-Man keeping us busy. And we're about to move to our 3rd house in 5 years (Thank you United States Air Force!). What ever adventures life brings us we're ready for it!


Monday, June 20, 2011

Back to the Real World

Well we got back from our vacation last night and it was back to work today. WaWa...


Thanks for all the support, advice, and suggestions you guys left about my chair dilemma last week. I'm going to order the fabric, search out some other upholstery quotes, and if nothing seems within my budget I'm going to tackle the project myself. :)


As you remember we were in Acapulco last week. Yay! The hubs and I have a lot to celebrate in the month of June. His birthday is in June, now we have Father's Day to celebrate, and our wedding anniversary (5 years!) 


We had a blast hanging out by the beach and pool, eating local food, and just relaxing before our move to Altus, OK. Here are some pics!


We stayed at the Grand Mayan thanks to the AFVC (Armed Forces Vacation Club). If your in the military and haven't heard of it check it out- they have amazing deals!

Lots of beach and pool time!


When we weren't lounging in the sun we went out downtown to see the famous Acapulco Cliff Divers, ate some awesome local food, saw some exotic wildlife at a freshwater lagoon, and even experienced an earthquake.


It was a fun trip but we missed The Con-Man and were glad to be home yesterday.

And last but not least this week I'm working on the top for my coffee tables! Hoping to be done by the weekend.    
                                                                                 :D


Wednesday, June 15, 2011

Total Genius or Totally Insane?

Sometimes I take on a project or get an idea where I don't know if it's really a good idea or feasible. This is one of those times. 


I saw these chairs at one of my favorite thrift stores and liked them right away. They have a good scale, are comfortable, and have clean lines. After talking the guy down to $60 each I felt like I got a good deal.


After I brought them home though, my husband had different feelings. Usually when I bring home an old piece of furniture or some street side rescue all I get is an eye roll or a head shake and maybe a  "Here we go again." 

This time though, he told me I got ripped off! I don't feel that way- I think these chairs could be really awesome if I reupholster them in a leather look fabric like this:


The fabric I'm looking at is pretty inexpensive. But I got a quote to reupholster them and it was $350 per chair not including the cost of fabric! So maybe my husband is right, maybe I made a bad decision this time. 

I'm thinking about tackling the upholstery job myself. I've seen lots of bloggers take on this task themselves with great results. There are lots of videos online that show the basics. It would be a big task and I really hope I don't mess the chairs or fabric up. 


So what do you think? Did I make a huge mistake with the purchase of these chairs? Or should I look at it as an opportunity to learn a new skill and (hopefully) end up with some awesome lounge chairs?