


I was also able to get some rare wood shop time in. If you remember I posted a few weeks ago about scoring some scrap wood from the shop.
I loved the contrast of the dark walnut and light oak- and gluing the pieces together to make a cutting board was what I had in mind for them.
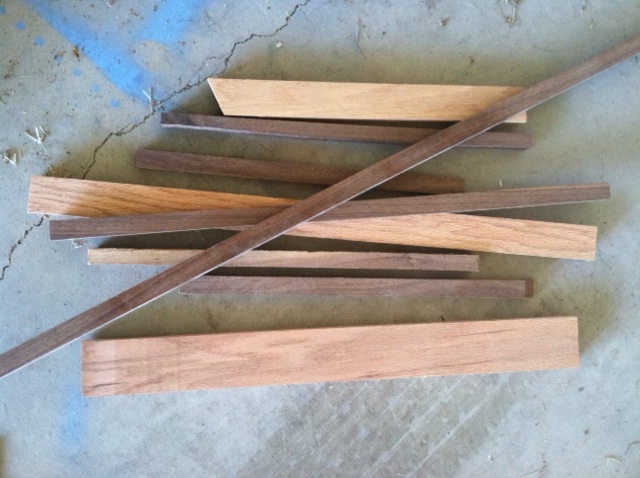

Next up was gluing the wood strips together using wood glue.

After gluing I clamped the pieces and let them dry overnight.

In the wood shop I used the table saw to cut my edges even. Then ran the board through the planer to even out the flat surface (my individual pieces were different widths). If you don't have access to a table saw a sander would work as well; it might take a little longer though. (Caution: IPhone Pics ahead)

To finish it off I wanted the edges rounded so I headed over to the router and got to work. I'm always nervous I'm going to mess up using the router but it's pretty straight forward and easy to use.

Then voila fini!! My cutting board came together pretty quickly- definitely an easy weekend project if your thinking of trying it out.


My cutting board still needs to be sealed. I have some tung oil on order from the Real Milk Paint Company- it's all natural and food safe. You have to be careful of the tung oil you find in big box stores; it's not always 100% natural therefore not always food safe. Just FYI~~

The wood scraps I chose are walnut and oak. I picked them because I liked the contrast of the two together. The only issue is that they are porous woods; not the best for cutting meat on. Once I seal the board it will be fine for cutting vegetables and cheese but I'll use my store bought cutting board for meat.
This is a quick and easy project anyone can tackle. The best part is that it was free!
Hope you all have a wonderful week ahead!
Linking to the DIY Club Monthly Contest

9 comments:
A mesa ficou linda..e perfeita! Parabéns..
Looks awesome. Gotta love the router! Cheers.
That looks awesome! I love the mix of wood tones!
That looks fantastic! I love multi-tone cutting boards like that.
so awesome Rachelle!! i bet it'll get plenty of use in the years to come!
It's great! But i'm such a mess doing DIY...
The wood colors are so beautiful. I love this!
Hey, I have a weekend link party I'd love for you to join if you'd like:
http://westernwarmth.blogspot.com/2012/10/weekend-warmth-6.html
Thanks, Bobi
I love how you reused the scraps for a cutting board, makes such a pretty one with the different tones! And I can't wait to see how your basketball court table will turn out!
Thanks so much for linking up at my Greener linky party, I really appreciate it!
It turned out great! Thanks for the tip on Tung Oil too! Thanks for sharing this at Rustic Restorations Weekend!
Post a Comment