But even my usual go to places for high style for less price weren't giving me any options I thought would work either. My problem is that I need a lot of panels- 5 to be exact for our living room. So that can add up quickly.
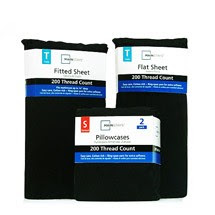
So while I was at Walmart the other day I noticed that their Mainstays cotton sheets came in a lot of colors. And you can buy them separately, not in a full set as most sheet come. I had used sheets for Con-Man room with some success and thought these were my answer.
So I bought 5 of them in Navy Blue for $5 each and hung them up in the living room. Later that evening when the Hubs came home he noticed them saying- "These are kind of plain don't you think?" Whoa- he never comments on any of my projects other than a smile and eye roll. This was serious. I mean, they are kind of plain because they're sheets.... not curtains. So what to do??
I had a large Royal Design Stencil that I won from Made By Girl that I had been meaning to use in our bedroom. Maybe this was the perfect time to try it out. Though most people use them on the was I figured it was ok to use it on fabric.
Using some leftover Poly acrylic paint, plastic drop cloths, and the brush they provided I got to work.
The process was pretty simple. I started in a corner and worked my way over. The stencil has guides that show you where to overlay it next. After a while I had this:
And just a warning (they might have this on their website or something) don't use a roller when using the clear lacquer. It might be ok to use on a wall with latex paint but I tried rolling the lacquer on first with a roller and got this:
It bled through really badly even though I tried to roll most of the lacquer off. Needless to say that corner went in the very back on the bottom. After I learned that lesson I used the brush they provided and got this:
So much better! It took longer (5 hours for all 5 panels) but the result was well worth it.
Once I was finished and all had dried I pulled the panels off the plastic drop cloth, it stuck a little bit but came off clean. This is when I noticed a happy accident.
The front of the panel had the design I painted, a subtle patten like I had wanted.
But the back is where I got a real surprise:
Apparently when the cloth stuck to the drop cloth some of the plastic must have stuck on to it, giving me a metallic pattern. Cool!
I liked this even better than the original design I had intended- so I hung them with the "back" facing the front. It's a pretty cool effect. It's still subtle- the light catches the design at different times of day; but it's noticeable and really cool!
I hung the curtains higher than the windows. Our ceilings are really tall, so I like the height the curtains gives the room. Not bad for $5 sheet right? Now the hubs approves!
So if you want to try this yourself here are my tips:
- Use the fat bristle brush intended for stenciling.
- Use the thick lacquer clear gloss (mine was semi gloss)
- Use a plastic drop cloth, not a fabric one
- If you need curtains that block light, you can use the white or same colored sheets as a liner
- Don't have a stencil? Even if you decided to buy one you still come out on top money wise if you use sheets because they are so inexpensive. Plus you could use the stencil for other projects! Worse case scenario you could always try to make a stencil or free hand a design like I saw here
Total Cost: Sheets $25 for 5 flat sheets
Rings $25 for 5 sets
Rod- Free! Came with the house
Lacquer- leftover from another project
$50 for a wall full of curtains ain't to shabby.
I'd love to hear if anyone else tries this out!
And last week some of you were asking about the orange chairs. While I do like the blue and orange combo the fabric on the chairs is not in the best of shape- stains, coming off in a few spots- things you would expect from vintage furniture. They're working good for now but I'm going to reupholster them sometime in the future.


8 comments:
clever! I like the "wrong" side, too. Thanks for the tips!
-Revi
These turned out so nice and the 'other' side does look fabulous.
The metallic look is so rich and modern looking. Love it!!
Wow, that is so neat. I like both sides, but the wrong side best :-) The next time I need window treatment I might give this a try.
Great idea....great style in your living room (love the chairs!)
Very cool. What a wonderful accident!
Hi Rachelle,
Glad to have found your blog. Love the happy accidental curtains :-) And the cane chair! I did a similar one which is in our guest room http://www.decoradventures.com/2011/06/year-long-chair-makeover.html
Let's be in touch! - Jessica
Love metallic! Thanks so much for linking up with us at Show & Share! Can't wait to see you again this Wednesday!
Marie
mylilpinkpocket.blogspot.com
Post a Comment