Showing posts with label how to. Show all posts

Wednesday, February 15, 2012

Boredom Buster: Oobleck

Warning! Don't do this activity unless don't mind a mess and are ready to have a lot of fun!


It's been really cold here in OK lately. We even had some unseasonal snow!


We don't get outside much because of the dreary cold weather. And on top of that the kids area at our local gym has been closed since December for remodeling. Being cooped up inside has led to a stir crazy Con-Man. This got me wondering how Con-Man and I were going to spend an afternoon and my mind wandered back to the 5th grade when our teacher read us the Dr. Suess book Bartholomew and The Oobleck. 


After she read the story we made Oobleck and played with it in the classroom. It's an interesting substance in that is is neither a liquid nor a solid. You can punch it with your palm but if you try to pick it up it acts like a liquid and slips through your hands.

I thought it would be a fun experiment for the Con-Man and I to try out. I found a great recipe on Instructables that even has a video. 

I had all the ingredients on hand- Cornstarch, water, and food coloring.


Mix 1 cup water with 1.5- 2 cups of cornstarch. Start with the water first then add the cornstarch a few tablespoons at a time. When your getting close to using most of your cornstarch add it more slowly, use your hands if necessary to mix it in. You want to get it to a state where it's not a liquid anymore but not so solid that it doesn't run though your fingers when you try to pick it up. Play with it some to get the right consistency.


Once you have the right feeling of weirdness add your food coloring. I used green since that what color it was in the book. Now it's time to play!

Con-Man was a little wary at first but he quickly went into mess making mode.


This was a great afternoon project because I had everything on hand to make it, it was easy to make, and it kept Con-Man occupied for almost an hour. Next time I do this I'll try to get the book from the library first and read it to him.

Though it splattered everywhere clean up wasn't to bad. Once it dries you can just wipe it up or take a damp towel and clean it up.

Has anyone else ever made Oobleck before?

Monday, January 24, 2011

DIY Closet Shelving

Lately a lot of the blogs I have been reading have focused on organizing for the New Year. The CSI Project had a whole contest on it and over at The Brooklyn Limestone she is showing off people's revamped junk drawers.


All this organization got me thinking about my dysfunctional closet I mentioned in an older post about our 1930's home. I meant to get to it ever since we moved in but it was a project that I put on the back burner. I feel like the only way for you to understand just how bad the situation is, is to show you a before picture.


Viewer warning, the image you are about to see may be disturbing to some readers!


AUGH! I'm so embarrassed! Piles of t-shirts from sorority/ college days, purses and bags on the floor, shoes scattered everywhere, to many clothes in a small space. Please don't judge me; look what I've been working with here.

So to remedy this sad situation I decided to add a third shelf to hold my bags and purses and a second rod for pants and skirts. I took my measurements and head over to my friendly Home Depot where I got all my supplies and had them do all the cutting.


I purchased a 14" wide board for the shelf, 2 1" x 2" strips to hold the shelf, and a wooden rod- all cut down to the size I needed. All my materials for 2 closets (mine and the Hubs) including paint was only $50. The most expensive item was the wooden rod. $3 per foot!

Anyway I got to work painting everything. I could have bought an already primed MDF board for the shelf but they were $15 each, I thought it was a little high so I bought the plain wooden ones. I just wanted to mention it in case someone wanted to skip some of the painting.

Once I got all the painting done it was time to take everything our of my closet and decide what to give away and what to keep.


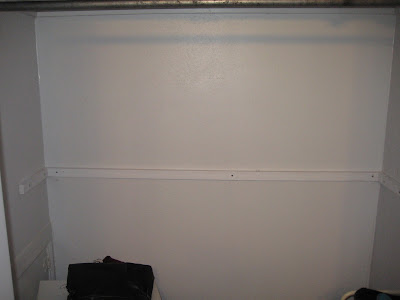
Next for the actual hanging. I measured 42" off the floor and used a level to hang the first long strip of wood to hold the shelf, then screw on the two side pieces. This was the moment of truth; were those measurements I took while 18 monthCon-Man was trying to "help" me hold the tape measure accurate? 


Success!

Now was time to hang the rod. I measured the same 42" up then about 6-8" out in front of the upper rod. This is to keep the clothes on the upper and lower rods from getting all tangled in each other.


This part was pretty easy. I bought the rod hanger thingys, just 1 screw for each side and done! (You know, these things:


And now for the finished product!


Ok, I know it's still not the most beautiful closet in the world. Not like this one from Made By Girl but I can actually find my clothes, stuff is off the floor, the world is good again! And check out those neatly folded T-Shirts!

How is everyone else organizing for the New Year?


Friday, July 23, 2010

Quick and Easy Way to Hang Pictures

I was hanging some pictures in Con-Man's room and thought it might be a good technique to share. I learned this back in the day when I worked at the furniture store. We changed up the displays often; so we needed a quick way to hang the pictures that went with the furniture.


Do you hate those picture frames that have the 2 hooks on each end for the nails? I do, I never have picture wire and if I didn't know about this way to hang pictures, mine would come out crooked every time. So, try this next time instead:


Lay the picture you are hanging face down. Take some masking tape or painters tape (anything that is not very tacky so it won't peel the paint off the wall) and lay it over the hooks where the nails will go. Then use a pen to mark where the hooks are.


Close up shot of pen mark. Make the mark at the very upper point of the hook. Most are a triangle shape, you will want your nail to go at the most upper point.


Next peel the tape off the picture frame and tape it on the wall at the height you want your picture to hang. Use a level to make sure it is straight. 


Now just hammer 2 nails in at the points you marked on the tape. After you are finished peel the tape off the wall. You are left with 2 nails in the perfect position on which to hang your picture.


See, quick and easy!

I've worked a lot of different design-type places throughout school and so forth; so I've picked up a lot of little tips like this. I'll post them periodlically as I think of them. Or if you have a question about something let me know! I'll answer it the best I can.

Don't forget that it's Creativity Week at Seven Thirty Three Blog! I'm being featured today!!!

Wednesday, July 21, 2010

End Table Redo

In our house we have a sunroom. It used to be just a place for me to fold laundry and watch TV. But since Con-Man was born, we have been using the sunroom for our guest room. Most of the furniture in there is a mix of leftovers that didn't fit else where in our house. Like these end tables I found on the curb:


(Sorry about the bad picture quality! I lost the charger for my new camera and have been using my old one...)

I like the style of the tables, kind of retro modern. But the finish on each is pretty bad, Cheap wood laminate. I never thought anyone would really see them but me, but we've been having a lot of company over lately and have some more coming this weekend. So I decided it's time for a little sprucing up. 

I thought a pattern on top of the tables would be a nice look. This technique didn't take me very long, just 2-3 hours for the whole project.


I really liked the pattern on this image I found on the internet. 


I enlarged it on Photoshop.


Then cut the shapes out with an Exacto Knife. This took me the longest. I knew choosing a complicated pattern would take more time but I liked it. (Ugh my camera is horrible!)


I did then a light sanding so the paint would adhere better.


Next I painted the tops of the tables with some leftover paint I had. 


I matched up the templates and taped them down to the table. For a really clean look contact paper would have worked better, but then I would have had to cut the shapes out twice since my printer won't print on contact paper. 

Then I went to work with the spray paint! I used Rustoleum Heirloom White.


I think they turned out pretty cute! Not bad for finding them on the street, all this project cost me was $4 for spray paint!


Here they are in the sunroom.


Next project has to be recovering those pillows that came with the couch. Can you see them in the corner of the pic? They're pretty blah.

Linking here

Thursday, July 15, 2010

Birthday Baking

Connor's 1st Birthday is tomorrow! I can't believe my little baby is going to be 1 year old. He's so grown up. ;..)

So to celebrate all of our family is coming in town. They never get to see him since we live San Antonio and they live in Houston and Baton Rouge. So I figured I wouldn't be able to do anything to creative this weekend except make Connor's cake! I don't have a lot of practice baking but I love to cook and have lots of inspiration:

My friend Angie has her own company Callooh Callay Creations where she's always making lots of yummy stuff.
http://twitter.com/calloohcallay09


 Or all the scrumptious cupcakeries here in town offer lots of eye candy as well.

Cupcake Couture


Or Saweet! Cupcakes


Anyway, I'm making myself hungry. What kind of mom would I be if I didn't atleast attempt to make my son's first birthday cake? I decided to use a recipe my mom gave me that I've had several times. The cake is so light and fluffy and the icing is to die for. I just hope I can make it the same way she does. Here's the recipe:

Vanilla Cake Batter
Makes about 6 cups. Prep 20 min.
(Add an additional 1/4 tsp vanilla extract if you don't have almond extract.)

2 cups sugar
1 cup butter, softened
3 large eggs
1 tsp. vanilla extract
1/4 tsp. almond extract (I'm going to add a little more of each of these so its extra flavorful)
3 cups cake flour (I'm using Swans in the red box)
1 1/2 tsp. baking powder
1/4 tsp. salt
1 cup buttermilk

Directions:
1. Beat sugar and butter at medium speed with a heavy- duty mixer until creamy and fluffy (about 5 minutes). Add eggs 1 at a time, beating until yellow disappears after each addition. Beat in vanilla and almond extracts.

2. Whisk together flour, baking powder, and salt in a small bowl; add sugar to mixture alternately with buttermilk, beginning and ending with flour mixture. Beat at medium- low speed just until blended after each addition. (Batter will be thick.)

I'm making cupcakes so I followed these directions:

Vanilla Cupcakes
Prepare basic Vanilla Cake Batter as directed. Place paper baking cups in muffin pans and coat with vegetable spray; spoon batter into cups, filling three-fourths full. Bake at 350 for 20- 25 minutes or until a wooden pick insterted in center comes out clean. Cool in pans or on wire rack for 10 minutes. Remove pans to wire rack and cool completely; about 1 hour (Seriously 1 hour!!!) Spread tops with buttercream frosting. Makes about 24 cupcakes

Phew that's a lot of words, I think I need some inspiration to keep me going.


That's better!

Vanilla Buttercream Frosting
Makes about 2 3/4 cups; Prep 10 min
If you love frosting double the recipe

1/2 cup butter softened
1 tsp. vanilla extract
1/8 tsp. salt
1 (16 oz.) package powdered sugar
3 to 5 tbsp milk

1. Beat first 3 ingredients at medium speed with an electric mixer until creamy.
2. Gradually add powdered sugar alternately with 3 Tbsp milk, 1 Tbsp at a time, beating at a low speed until blended and smooth after each addition. Beat in up to 2 Tbsp additional mild for desired consistency.

Hopefully Connor's cupcakes will turn out as good as those pictures. I don't want him to look back at his first birthday pics and be embarassed! Must...Channel...Cupcake...Goddesses...


I also uploaded the full article I got this recipe from. It was from Southern Living and had a lot of variations on the batter and icing. Yum!! Happy Baking!

Cake Recipe

And don't forget to check out my givewaway going on until Tuesday the 20th! Become a follower and post a comment. If your already a follower just comment!

Monday, July 12, 2010

Glass Tile Necklace

Do you ever go to the Home Improvement Store or Tile Shop and drool over the specialty glass tiles? Well I do. I would love to re-do my bathroom with mosaic tiles, but for now the cost is a little out of reach. I wondered if there was another way to bring these little beauties into my life without breaking the bank.


I received these tile samples from a rep at Interstyle Tile. They specialize in unique and specialty tile. The tile they sell is pretty expensive so I was excited to get some free samples. I wasn't sure what to do with them though. There weren't enough to make a mosaic or use for a table top (or redo my bathroom). I was trying to think out the box and thought they might make a cool necklace! My Dremel tool would be perfect for this project! I could use the diamond drill bit to drill a hole through the tile.

Just a side note- my personal opinion; if you are thinking about purchasing a new tool and already have the basics; a drill, mitre saw and sander you might want to consider a Dremel. They are so versatile! I've used mine for so many things I never thought I would. I was lucky enough to get one for my birthday. My husband knows me to well. Anyway just a thought...


To begin I taped the edge I was going to drill through. This will help the glass from shattering. 


I just want to stop a moment and mention safety again. Dremel doesn't recommend drilling through glass but it works so I do it.


Sadness- this is why Dremel doesn't recommend using the drill on glass. It can break. Tear..


Anyway I drilled straight down with minimal pressure. As in my previous glass cutting experience with the wine glasses I stopped every few minutes to dip the Dremel and the tile in water to keep them cool.


Some progress. It took about 10-15 minutes for me to drill the whole way through. Patience is the key.


Ugh- this picture didn't turn out well but it supposed to show the hole drilled all the way through. But success it worked!!


The finished necklace! I think its sassy and original. Where else could you get a necklace like this?


So I am giving it away! Just become a follower and leave a comment. If you are already a follower just comment to let me know; and maybe let me know what you think about the blog or what you would like to see more of. 

This Drawing is now over. Check back to see who the winner was!


Thursday, July 8, 2010

Birthday Shirt For Connor


Con-Man's first Birthday is coming up! I wanted to make something special for him to wear for his birthday. I have seen the shirts with the numbers on them and thought they were real cute. I didn't want to spend a ton of money on it since he'd only wear it once or twice. I took a trip to Walmart and got a T-shirt for $5. Then I looked for a fun font on Word. I didn't find the exact one I wanted but found one that was close.


I enlarged it with Photoshop and modified it a little.


I traced it on some old fabric leftover from some chairs I recovered.


I could have ironed it on with fusible webbing but choose to wing it and sew it on without it.


Using the embroidery stich on my sewing machine this is how it turned out. He looks so cute, I can't wait to for everyone to see him at his party!